REVIEW · TOKYO
Tokyo Cyberpunk Street Photo Tour
Tokyo looks made for a camera after sunset, and this tour puts you right in the middle of its best night scenes. You’ll move from Kabukicho’s neon streets and the narrow lanes of Omoide Yokocho to the people-filled spectacle of Shibuya Crossing. I like the mix of famous sights and smaller street corners, and I like that the guide works with both proper cameras and smartphones.
The small group, capped at four, gives you a real chance to ask questions. Guides including Charles, Lukasz, and Stephane have helped beginners adjust exposure, find stronger compositions, and use phone tools such as contrast and exposure lock. The main caution is the pace: one guest found the walking too fast and lost the group, while the huge Shinjuku Station area can also make the meeting point tricky to find.
Key points at a glance
- Night photography in three distinct settings: Work in Kabukicho, Omoide Yokocho, and around Shibuya Crossing.
- Useful help for phone photographers: You can receive practical advice for an iPhone or other smartphone, not just a DSLR or mirrorless camera.
- Long-exposure practice: The guide helps you handle glowing signs, moving crowds, and dark streets.
- Very small groups: A maximum of four people allows for more individual attention.
- Train transfer between districts: The move from Shinjuku to Shibuya is made by train, with the fare paid separately.
- Strong overall rating: The experience is rated 4.9 from 165 reviews, with 97 percent recommending it.
Why Tokyo after dark works so well for photography
Tokyo’s night scenes give you plenty to work with even if you are new to photography. Neon signs create color and reflections. Pedestrians give your pictures motion and scale. Trains, traffic, shop fronts, alleys, and illuminated buildings offer lines and layers that are hard to find in a quiet daytime street.
The tour focuses on how to use those elements rather than simply walking past them. You may be shown where to stand, what to include at the edge of the frame, and how to balance bright signage against darker streets. That makes the outing useful for people who want more than a set of snapshots.
The title suggests a cyberpunk mood, and Shibuya can certainly provide it. The glowing signs, dense crowds, and wet pavement after rain can produce a futuristic look. Still, this is not a film-location tour or a costumed experience. The value comes from learning to photograph real Tokyo nightlife as it unfolds around you.
You do not need advanced skills. Several guides have worked patiently with beginners, while also helping experienced photographers make more precise changes to shutter speed, exposure, and composition. You should, however, arrive ready to walk, watch your surroundings, and make quick adjustments in crowded streets.
More Photography Tours in Japan
- Tokyo by Night Photography Tour (Private Option Available)
★ 5.0 · 151 reviews - Tokyo Shinjuku Night Photo Tour with Pro Gota
★ 5.0 · 142 reviews - Tokyo: Evening Photography Tour
★ 4.8 · 61 reviews
Starting near Shinjuku Station
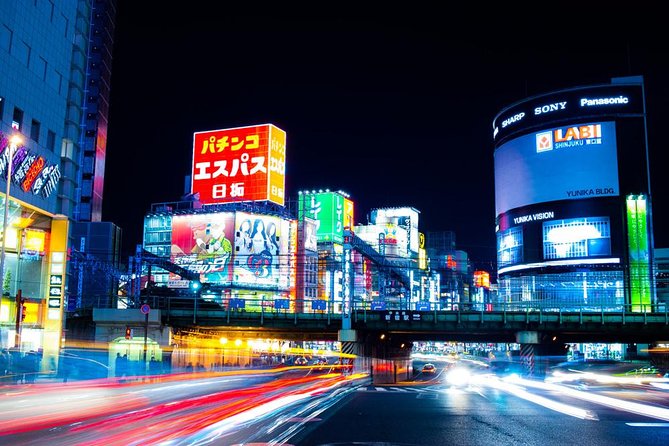
The meeting point is at Happy Lemon Keio Shinjuku Shop, at 1-chōme-1-4 Nishishinjuku, Shinjuku City. The start time is 7:00 pm, when the district is already shifting into its evening rhythm.
Give yourself extra time to find the spot. Shinjuku Station is enormous, and one person arrived early but still spent about 20 minutes locating the group. The directions may be clear once you understand the area, but the station and surrounding streets can be confusing if this is your first visit.
This is a good reason to download your mobile ticket and meeting details before you leave your hotel. The tour is near public transportation, but being near a station does not mean the entrance will be obvious. I would aim to arrive early rather than cut it close.
The first part takes place around Shinjuku, one of Tokyo’s busiest evening districts. You will likely begin by getting comfortable with your camera in a place full of light, movement, and visual distractions. That is useful practice because the guide can see how you work before offering more tailored suggestions.
Kabukicho: neon, signs, and moving subjects
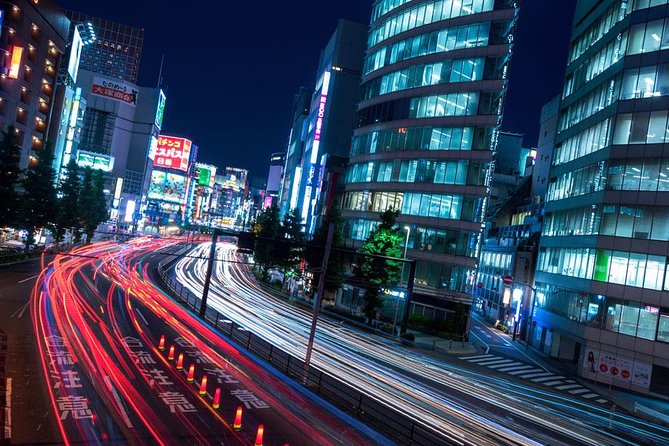
Kabukicho receives about an hour of the itinerary. This is the place to work with glowing signs, crowded sidewalks, and the sharp contrast between bright storefronts and darker side streets.
A professional photography instructor is included, and the instruction is hands-on. Guides have shown people how to change settings for night scenes, how to seek out clean lines, and how to frame signs without letting them take over the whole picture. If you use a camera with manual control, you can practice shutter speed and exposure adjustments. If you use a phone, you can still work on framing, contrast, and exposure lock.
The area is visually generous, but that can also be its problem. With signs competing for your attention, it is easy to point your camera at the nearest bright object and call it done. The guide’s role is to help you slow down and decide what the picture is actually about.
For candid street photography, keep your expectations sensible. You will be in a public place, surrounded by people moving through their evening. The point is to learn how to notice moments and compose quickly, not to arrange elaborate portraits.
Guides have included Charles, Lukasz, Stephane, and Nat, and the experience can vary slightly with the person leading your group. Charles has been praised for explaining camera settings clearly and working well with phone users. Lukasz has used a demonstration-then-practice approach, showing a technique and then giving participants time to try it. Stephane has focused on composition and finding the right frame.
Omoide Yokocho and the appeal of tighter frames
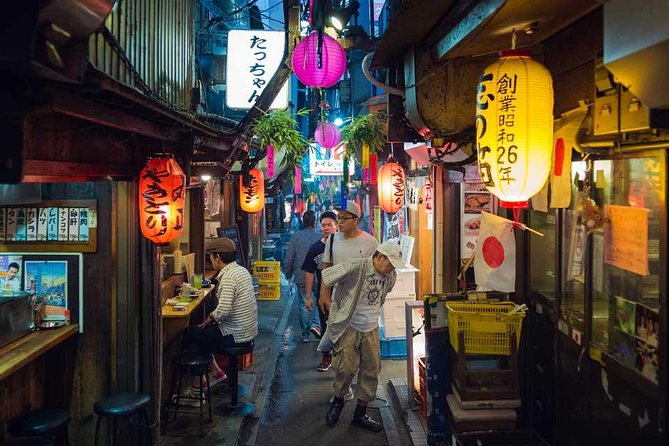
The tour then spends around 30 minutes at Omoide Yokocho, also known as Memory Lane. This narrow dining area offers a different kind of night photograph from Kabukicho. Instead of broad streets and huge signs, you get tighter spaces, small lights, textured surfaces, and a more intimate sense of place.
Half an hour is not a long time, so you should be ready to work. This stop rewards a camera or phone that can handle low light, but technique matters more than expensive equipment. Look for repeating lines, pools of light, people passing between stalls, and small details that show the character of the lane.
The compact setting makes composition easier to discuss. You can compare a wide view with a close frame and see how much background you really need. Your guide may also help you avoid clutter, which is one of the biggest problems in night street photography.
There is a tradeoff. Omoide Yokocho is a popular place, and narrow lanes can feel crowded. You need to keep your equipment close and remain aware of people around you. The tour is a photo walk, not a meal stop, and the listed itinerary does not include food or drink.
More Photography Tours in Tokyo
- Asakusa Kimono Photography Tour
★ 5.0 · 8 reviews
The train to Shibuya costs extra
After the Shinjuku portion, you travel by train to Shibuya. The train fare is not included, so keep some payment method ready. This transfer is a practical part of the route, but it also affects the evening in two ways.
First, it lets you photograph two major districts without spending the entire tour in one neighborhood. Second, it takes time away from shooting. The tour is described as roughly three hours, while the detailed schedule calls it about 2.5 hours, so do not expect a full evening workshop with unlimited time at every stop.
The transfer also means you should wear comfortable shoes and keep your gear light. A large tripod can be awkward on trains and in crowded streets. One review specifically suggested bringing a tripod and a camera with some control over shutter speed or overall exposure, but you should balance that advice against the compact, mobile nature of the outing.
The group size helps here. With no more than four participants, it should be easier to stay together than on a large commercial walking tour. Still, crowded stations require attention. One person had difficulty keeping up with the guide and eventually missed the final hour, so tell the guide if you need to slow down.
Shibuya Crossing: the main event
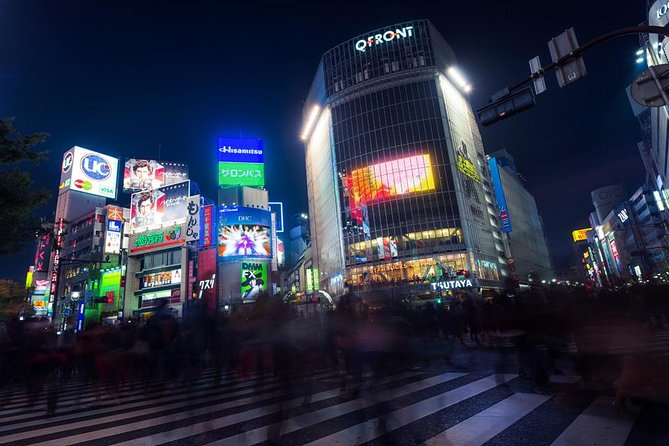
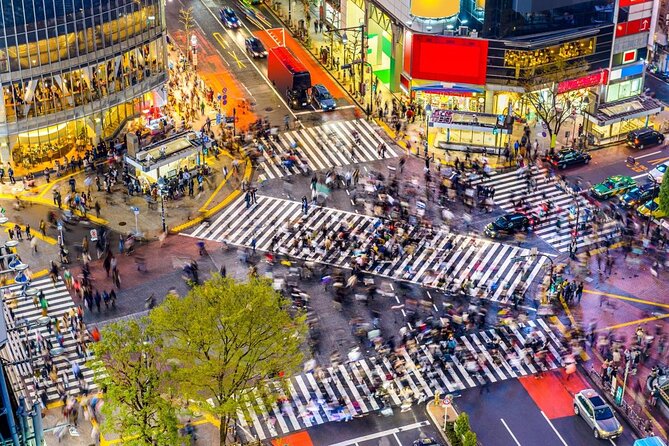
The tour finishes in the Shibuya area, with about 45 minutes at Shibuya Crossing. This is the most recognizable scene on the route and the spot most likely to deliver the cyberpunk effect promised by the title.
Thousands of people can move through the intersection in a matter of minutes. That gives you several ways to photograph it. You can freeze individual figures, use a slower shutter speed to create movement, or frame the crossing against the surrounding signs and buildings.
The crossing has also been linked with the visual mood of Blade Runner. That comparison is useful as a shorthand for the glowing, crowded, futuristic atmosphere, but the real experience is less theatrical and more immediate. You are photographing ordinary city life on a remarkable scale.
Forty-five minutes is enough for instruction and practice, but it can pass quickly. If you already know your camera, you may want to spend most of this time refining composition instead of asking about basic settings. Beginners should not feel rushed, though. Guides have been praised for giving individual attention and helping each person get usable images.
The tour ends at Shibuya Station, near 2-chōme-2-1 Dōgenzaka. That is convenient if you want to continue your evening in Shibuya, but it is not a return to Shinjuku. Plan your onward route before the tour begins.
What you can learn in three hours
The strongest part of this experience is the workshop element. You are not simply told that a scene is photogenic. You are shown how to deal with it.
Expect advice in several areas:
- Exposure: Night scenes contain very bright signs and deep shadows. You may need to adjust exposure so the signs are not washed out.
- Shutter speed: A slower setting can show movement, while a faster one can freeze a person crossing the frame.
- Composition: Guides can point out lines, framing options, background clutter, and the best position for a particular view.
- Phone photography: Participants using iPhones have received advice on contrast, exposure controls, and the lock function.
- Camera-specific help: Guides have worked with Canon, Fuji, and other camera systems, although the exact help depends on the model you bring.
- Finding a position: The guide may scout useful spots, saving you time in busy streets.
This is not a formal classroom course with printed notes or a long lecture. You learn by walking to a scene, receiving a quick explanation, taking pictures, and trying again. I prefer that method for street photography because the lesson is tied to a real situation.
The tour can also help you see Tokyo differently. Instead of only photographing famous signs, you begin to notice reflections, gaps between buildings, silhouettes, and the way crowds move. That change in attention may be more useful than any single camera setting.
Camera, phone, and tripod advice
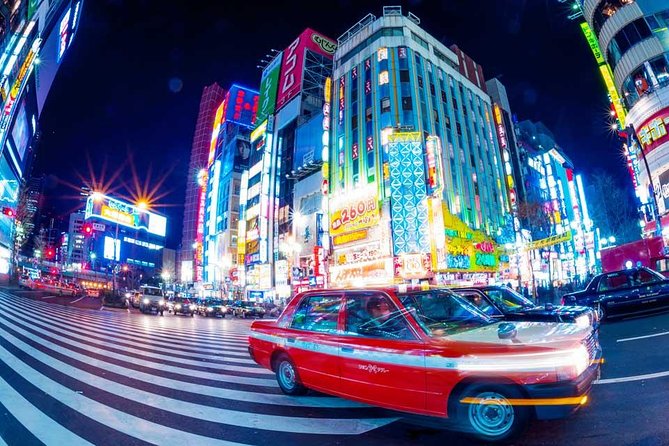
You can bring a camera or a smartphone. A phone is enough to take part, and the guides have made a point of helping people get better results from mobile cameras. If your phone allows exposure adjustment, night mode control, or exposure lock, you will have more options.
A camera with manual control over shutter speed or overall exposure is useful for long exposures. You do not need to be an expert, but you should know how to turn the camera on and have the battery charged. Bring spare power if you have it, since night shooting and phone screens can use energy quickly. The supplied information does not state that spare batteries or chargers are provided, so do not rely on the tour for them.
A tripod can help with long exposure, and one reviewer recommended bringing one. Yet you will be walking through Shinjuku, taking a train, and working in crowded areas. A small, lightweight tripod makes more sense than a large professional model. If you prefer to travel light, ask yourself if you really need long exposures or if handheld phone photography is your priority.
The small-group value at $184.99
The price is $184.99 per group of up to two people. That is not a cheap add-on, but the pricing makes more sense for a couple or two friends than for one person paying alone. A group of two is effectively paying for a private-style session, while a larger group of four can still expect a more personal format than a standard sightseeing walk.
The professional instructor is included. Train fare is not, and there is no mention of food, drinks, or equipment rental being included. The tour’s value rests on the guide’s time, local route, and photography coaching.
I think the price is easiest to justify if you want instruction rather than just a nighttime stroll. A casual visitor can see Shibuya Crossing without paying for a tour. The added value is having someone show you where to stand, explain why a setting works, and correct problems while you still have time to retake the picture.
The 4.9 rating from 165 reviews and 97 percent recommendation figure suggest a consistently strong experience, but the lower ratings point to real limitations. You need to keep up, find the meeting point, and accept that the evening is focused mainly on photography. One person called it a basic night walk and felt it offered little wider city insight. That is fair. This is not the right choice if your main goal is a detailed cultural or historical tour of Shinjuku and Shibuya.
Who should book this photo walk
I would recommend it to:
- First-time visitors who want an easy way to photograph Tokyo after dark.
- Couples or friends who want a small-group activity rather than a large tour.
- Smartphone photographers who want practical tips they can use immediately.
- Beginners who feel unsure about manual settings.
- Experienced photographers looking for strong night scenes and local shooting positions.
- People arriving in Tokyo who want a guided introduction to Shinjuku and Shibuya at night.
I would hesitate if you dislike walking at a quick pace, have difficulty staying with a group, or want a relaxed sightseeing stroll. The tour also may not suit someone seeking meals, nightlife recommendations, or detailed history. Its focus is clear: find scenes, improve your technique, and leave with photographs.
The experience requires good weather. If poor weather causes cancellation, you are offered another date or a full refund. Otherwise, the booking is non-refundable and cannot be changed, so choose your date carefully.
Should you book the Tokyo Cyberpunk Street Photo Tour?
Book it if you want to learn while photographing some of Tokyo’s most rewarding night scenes. The route has a sensible progression: wide neon streets in Kabukicho, tighter compositions at Omoide Yokocho, and fast-moving crowds at Shibuya Crossing. The small group and hands-on teaching are the main reasons to pay for it.
I would be especially comfortable recommending it to phone users and beginners. Guides such as Charles, Lukasz, and Stephane have helped people at very different skill levels, and the workshop style gives you a chance to practice instead of just listen.
Before booking, make sure you can walk at a reasonable pace, locate the Shinjuku meeting point, and manage your own camera or phone. If you do that, you should come away with more than neon snapshots. You will have a better sense of how to look at Tokyo after dark.
FAQ
How long does the Tokyo Cyberpunk Street Photo Tour last?
The experience lasts approximately three hours. The detailed description places the photo adventure at about 2.5 hours, so allow roughly three hours for the full outing.
What time does the tour start?
The tour starts at 7:00 pm.
Where does the tour begin?
It begins at Happy Lemon Keio Shinjuku Shop, 1-chōme-1-4 Nishishinjuku, Shinjuku City, Tokyo 160-0023, Japan.
Where does the tour finish?
It finishes at 2-chōme-2-1 Dōgenzaka, Shibuya, Tokyo 150-0043, Japan, near Shibuya Station.
What locations are included?
The route includes Kabukicho District, Omoide Yokocho Memory Lane, and Shibuya Crossing. It also includes travel by train from Shinjuku to Shibuya.
Is the train fare included?
No. The train fare from Shinjuku to Shibuya is paid separately by each participant.
Can I use a smartphone instead of a camera?
Yes. The tour supports photography with a camera or smartphone, and guides have provided tips for iPhone users.
How many people can join?
The maximum group size is four people.
Is the tour refundable if I cancel?
No. The experience is non-refundable and cannot normally be changed. If poor weather causes the operator to cancel, you are offered another date or a full refund.
More Street Photography Tours in Tokyo
- Saigon Street Photography Experience
★ 5.0 · 56 reviews - Learn the art of street photography in the heart of Montmartre!
★ 5.0 · 33 reviews - London Street Photo workshop
★ 5.0 · 10 reviews - Kolkata Full-Day Street Photography Tour
★ 5.0 · 2 reviews
Just added around Tokyo
- Tokyo: Shinjuku & Shibuya historical guided photoshoot Tour★ 5.0 · 2 reviews
- Asakusa Kimono/Yukata Rental & Photography_Tsutsuji★ 5.0 · 12 reviews
- Asakusa Kimono Photography Tour★ 5.0 · 8 reviews
- Personal Travel and Vacation Photographer Tour in Tokyo★ 5.0 · 19 reviews
- Tokyo: Photo Shoot with a Private Vacation Photographer★ 5.0 · 53 reviews
- Travel Tokyo with Your Own Personal Photographer★ 5.0 · 43 reviews
- Tokyo: Photography Masterclass – Private Photo Lesson★ 5.0 · 7 reviews
- Blade Runner photo workshop in Shibuya with Laurence Bouchard★ 5.0 · 15 reviews
Street Photography Tours, compared.
Learn the art of street photography in the heart of Montmartre!
Read our review →