
REVIEW · LONDON
Discover Photography
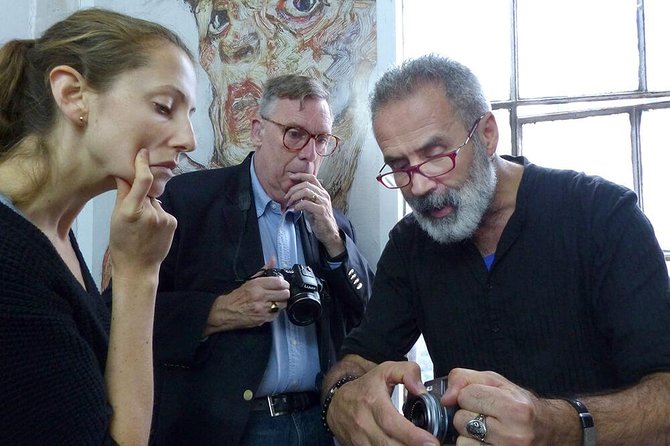
The useful part of Discover Photography is that it gets past the camera’s big green automatic button. In a small group of no more than 12, you learn how aperture, shutter speed, and ISO work together, then put those settings to work with guidance from an award-winning photographer.
I like the hands-on format, since photography makes more sense when you see the effect of a setting in an actual image. I also like the focus on practical camera control, including lenses, white balance, depth of field, and semi-automatic modes. The main catch is simple: you need a DSLR or compact digital camera with manual settings, and the non-refundable booking policy leaves little room for a last-minute change.
Key points
- Manual camera skills: Learn to move beyond automatic mode and control exposure yourself.
- Small class size: The maximum of 12 people allows room for questions and individual help.
- Practical exercises: Test aperture and shutter speed rather than only hearing technical explanations.
- Award-winning instruction: Sessions may be led by photographers such as Vehbi Koca or Pierre, depending on the class.
- Broad foundation: Cover lenses, focal length, composition, color temperature, white balance, and perspective.
- Central London setting: Meet at Westland Place Studios, close to public transportation, and finish where you started.
What Discover Photography teaches in 2.5 hours
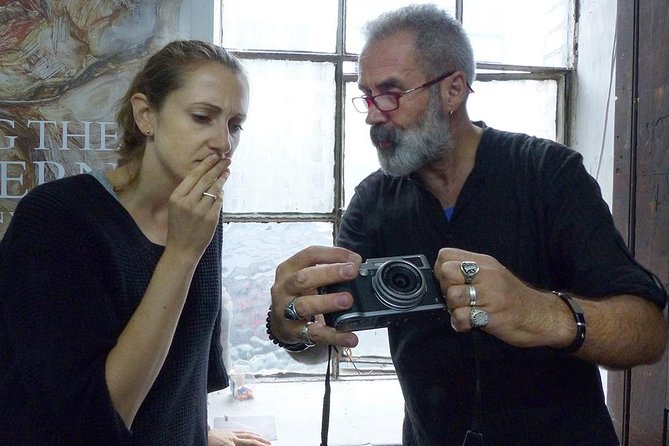
This is a beginner course built around one useful goal: giving you control over the camera you already own. The session lasts about two hours and 30 minutes, long enough to cover the basics without turning into a full photography degree.
You will learn how to use semi-automatic and manual modes, set an exposure, understand the relationship between aperture, shutter speed, and ISO, and choose settings for different photographic effects. The course also covers lenses, focal length, angle of view, perspective, composition, color temperature, and white balance.
That list may look technical, but these are the controls that decide whether your photo has a blurred background, a frozen subject, a sense of movement, or accurate color. The value comes from learning how the pieces connect. Changing one setting often affects another, and the instructor helps you see that relationship rather than memorize isolated terms.
You should leave with a clearer idea of what your camera can do and when to use more than automatic mode. That is a useful outcome for anyone who takes photos on city breaks, family trips, or weekend walks and feels the camera is doing all the thinking.
A few more photo experiences around London worth a look
- London: Private Photoshoot with Video Clip Option
★ 4.8 · 182 reviews - Professional Photoshoot in London Photographer
★ 5.0 · 102 reviews - Private landmarks photoshoot for families and couples
★ 5.0 · 92 reviews
Meeting the camera at Westland Place Studios
The class starts at Westland Place Studios3, 11 Westland Place, London N1 7LP. It is near public transportation, which makes the meeting point practical for a short London activity. The session ends back at the same location, so you do not need to arrange a separate pickup or find your way to a different end point.
The supplied details do not describe a long walking route or a series of London landmarks. Think of this as a classroom-based photography workshop with practical work, not a sightseeing tour with a camera theme. That distinction matters. You are paying for instruction and camera practice, not for guided views of London.
The setting also keeps the experience focused. You are not spending much of the session moving between attractions. Instead, the time goes toward learning controls, asking questions, and trying techniques. For a first course, that can be a better use of two and a half hours than rushing from one photo stop to another.
Why the group limit of 12 matters
A maximum of 12 people is a good size for a beginner photography lesson. It is large enough to create a little energy in the room but small enough for the instructor to help with individual cameras.
That matters because menus and buttons vary widely. A Canon, Nikon, Sony, Fujifilm, or compact camera may use different names or place controls in different spots. A general explanation is useful, but you also need someone to show you where the setting lives on your own camera.
The course has received especially strong praise for clear explanations, helpful methods, and a willingness to work with different cameras. Vehbi Koca has been singled out for explaining complicated ideas simply and encouraging experimentation. Pierre has also led a session focused on iPhone settings, answering questions and helping people keep pace with the material.
For this particular course, you should still bring a DSLR or compact digital camera with manual settings. The iPhone teaching experience suggests an adaptable teaching style, but it does not change the stated equipment requirement for getting the most from Discover Photography. If you only use a phone, confirm that this is the right session before paying.
Aperture, shutter speed, and ISO without the fog
The heart of the course is exposure. In plain terms, exposure is how light or dark your photograph appears. Aperture, shutter speed, and ISO each affect the result, and understanding their relationship is the key step between automatic snapshots and intentional pictures.
Aperture controls the opening in the lens. It affects how much light reaches the sensor and how much of the image appears sharp from front to back. The course connects aperture with depth of field, so you can begin to understand why one image has a soft background while another keeps more of the scene in focus.
Shutter speed controls how long the camera records the image. A fast shutter speed can help freeze movement, while a slower speed can show motion or create blur. The course includes a practical exercise on the effects of aperture and shutter speed, which is important because these changes are easier to understand in a picture than in a definition.
ISO affects the camera’s sensitivity to light. Although the supplied details do not describe a separate ISO exercise, ISO is part of the exposure relationship taught in the course. You should come away with a better sense of which control to change when the light, movement, or desired effect changes.
This is where an instructor’s patience matters. Beginners often know that a photo is too dark, too bright, or blurry but do not know which setting caused the trouble. The class aims to give you a method for solving that problem.
Same place, a different kind of shoot:
- London: Private Landmark Tour with Professional Photographer
★ 4.7 · 91 reviews - Professional Private Photoshoot in London
★ 5.0 · 63 reviews - London: Private travel vacation photoshoot -Romantic Special
★ 4.7 · 50 reviews - Private Tour: Night Photography Tour in London
★ 5.0 · 48 reviews
From automatic mode to real control
You do not have to abandon automatic mode forever. One useful feature of the course is that it covers both semi-automatic and manual modes, giving you a gradual route toward control.
Semi-automatic modes let you choose one major setting while the camera handles part of the exposure. This can be a sensible way to learn. You make a creative choice, then watch how the camera responds. Manual mode gives you full control, but it also requires more attention.
For a beginner, that progression is more useful than being told to switch straight to manual mode. You can learn what aperture priority or shutter priority does, then decide when full manual control is worth the extra work.
The aim is not to make every photo complicated. It is to help you know when automatic mode is fine and when the camera needs more direction. A quick family picture may not need careful manual adjustment. A portrait, a moving subject, or a difficult lighting situation may benefit from it.
Lenses, focal length, and perspective
The course also covers how lenses affect a photograph. Focal length changes the angle of view, which changes how much of a scene fits into the frame and how close or far away subjects appear.
This is useful travel knowledge. A lens is not just a piece of glass that zooms in or out. It changes the feel of the image and your relationship to the subject. The class connects focal length with perspective, helping you understand why the same subject can look different when photographed with different lenses or from a different position.
You will also discuss making the most of each lens. That is good news if you own more than one and tend to leave one attached all the time. It is equally useful if you have a basic kit lens and want to learn what it can do before spending money on new equipment.
No extra lens purchase is required by the supplied information. This is a course about using the camera you have, not a sales pitch for more gear.
Composition, color, and white balance
Technical settings are only half the picture. Discover Photography includes composition, color temperature, and white balance, three areas that help your photos look more deliberate.
Composition is how you arrange elements inside the frame. The details do not promise a long list of named composition rules, so you should not expect a formal survey of every photographic theory. You can expect composition to be part of the course’s broader foundation, alongside lenses and exposure.
White balance helps the camera record color more accurately under different types of light. Indoor lighting, daylight, and other conditions can make a scene look warmer or cooler. Learning color temperature gives you another way to correct a photo or use color for effect.
These subjects are easy to overlook when you are focused on buttons and numbers. Including them makes the course more useful for real travel photography. A technically sharp image can still feel flat if the framing is weak or the color looks wrong.
The practical exercise is the key test
The most valuable part of the session is the practical exercise exploring aperture and shutter speed. This gives you a chance to move from theory to cause and effect.
You may find that one setting creates a sharper moving subject, while another produces blur. You may also see how aperture changes the amount of the scene that appears in focus. The point is not simply to copy a preset. It is to understand what happened and why.
That practical work also gives you a chance to ask for help with your own camera. The instructor’s role is especially useful here because camera controls are not always obvious. A small class makes it more likely that you can stop and ask rather than quietly fall behind.
The available session feedback places strong emphasis on clear teaching, useful methods, and encouragement to experiment. That is exactly the right approach for beginners. You need enough structure to avoid confusion, but also permission to try a setting, make a mistake, and see the result.
How the instructors shape the experience
The course is led by an award-winning photographer. Named instructors connected with the sessions include Vehbi Koca and Pierre.
Vehbi Koca is particularly associated with simple explanations, practical methods, and a helpful attitude toward different camera types. That combination matters more to a beginner than a long list of professional achievements. A strong photographer is not automatically a strong teacher, so the teaching style is worth noting.
Pierre has led a session about iPhone photography settings and focused on helping everyone keep up with the information. If your class is taught by someone else, the exact style may vary, but the course is designed around direct instruction and questions rather than a one-way lecture.
You should ask questions as they arise. Photography terms can blur together quickly, and a small clarification about ISO, focus, or white balance may save you a lot of frustration later.
Is $95.80 good value?
At $95.80 per person, this is not a cheap casual activity. It is priced more like a focused skills workshop, and the value depends on whether you want to learn rather than simply take pictures in London.
I think the price is reasonable for a two-and-a-half-hour session with an award-winning photographer and a maximum group size of 12. You are getting structured instruction across exposure, lenses, composition, color, and camera modes. The course can also save you from learning through scattered online videos that use different cameras and assume more background knowledge.
The value is weaker if you already understand manual exposure, depth of field, focal length, and white balance. In that case, the class may cover familiar ground. It is also a poor fit if you want a guided photo walk through famous London locations.
For a new DSLR owner or a compact-camera user who wants to stop guessing, the cost can make sense. The skills are reusable long after the class ends, which is more useful than a one-off attraction photo.
Who should book this class?
This course suits adults who own a camera with manual settings and want a firm start in photography. It is also a good choice if you understand basic camera operation but feel unsure about aperture, shutter speed, or choosing the right mode.
The minimum age is 18. Children must be accompanied by an adult, and both need paid tickets. Most people can participate, and the meeting point is near public transportation.
Bring the camera you actually plan to use. If possible, arrive with the battery charged and enough storage for practice images, although those preparation details are not specifically required in the supplied information. More important is knowing whether your camera has manual controls.
The booking is non-refundable and cannot be changed for any reason. That makes it wise to check your date, age requirements, and equipment before paying. If the provider cancels because the minimum number of participants is not reached, you will be offered another date or experience, or a full refund.
Should you book Discover Photography?
Book it if you want practical help using a DSLR or manual compact camera and prefer a small class over teaching yourself. The strongest reasons are the clear focus on exposure, the chance to test settings in practice, the limited group size, and instructors such as Vehbi Koca and Pierre who are used to answering questions.
Skip it if you only have a fully automatic camera, want an iPhone-only course, or expect a sightseeing walk around London. Also think twice if you already shoot confidently in manual mode.
For the right beginner, this is a sensible way to turn a confusing camera into a more useful travel tool. Just confirm your equipment and date first, since the strict cancellation terms leave no easy second chance.
FAQ
Where does Discover Photography take place?
The course starts and ends at Westland Place Studios3, 11 Westland Place, London N1 7LP, UK.
How long does the photography course last?
The session lasts approximately two hours and 30 minutes.
How much does the experience cost?
The listed price is $95.80 per person.
What camera should I bring?
You need a DSLR camera or a compact digital camera with manual settings to get the most from the course.
How many people can join the class?
The maximum group size is 12 participants.
What age do I need to be?
The minimum age is 18. Children must be accompanied by an adult, and both must have paid tickets.
Can I cancel or change my booking?
The experience is non-refundable and cannot be changed for any reason. If the provider cancels because the minimum number of participants is not reached, you will be offered another date or experience, or a full refund.
Just added around London
- Wildlife Photography Workshop in Richmond Park in London★ 4.5 · 5 reviews
- Private Tour: Photography Walking Tour from Trafalgar Square to Covent Garden★ 5.0 · 5 reviews
- Street Photography Workshops in London★ 5.0 · 6 reviews
- South Bank Photography Tour – Small Group★ 5.0 · 2 reviews
- Ultimate introduction to photography in Central London★ 5.0 · 19 reviews
- Shoreditch Street Art Private Photography Tour including Brick Lane★ 5.0 · 5 reviews
- Private Landmark Photoshoot★ 5.0 · 27 reviews
- PRIVATE PHOTOSHOOT in London★ 5.0 · 6 reviews
London Photo Tours & Photoshoots, compared.
Professional Photoshoot in London Photographer
Read our review →
Browse the lists this tour appears in